Learning to tack up your horse correctly for a ride can be stressful. Especially as a beginner, when you’re concerned about safety and are overwhelmed by buckles and equipment. In this step by step guide we’ll review exactly how to tack up your horse western. Including how to put on your saddle, bridle and prepare your horse to ride correctly.
Before you begin grooming and tacking up your horse, be sure you have all of your equipment ready. This includes saddle, bridle, pad, brushes etc. This way, you won’t have to leave your horse unattended while you run back and forth to the tack room for supplies. Nor will you have to keep running around to look for the items you need.
Thoroughly Groom Your Horse Before Tacking Up
As mentioned in our guide to tacking up English, the vital first step for tacking up to ride is grooming! It’s important to get your horse’s hair and skin nice and clean before placing any tack on them! This is necessary in order to avoid any rubs or sores. It’ll also help you to avoid any discomfort for your horse, bond with your horse and give you a chance to analyze their overall health and condition. Take this opportunity to see if your horse has any bumps, rocks stuck in their hooves or a loose shoe.
Skipping this step or doing it lazily could be very detrimental to your horse! For more information on grooming check out this article where I share my Daily Grooming Routine for my own horses!
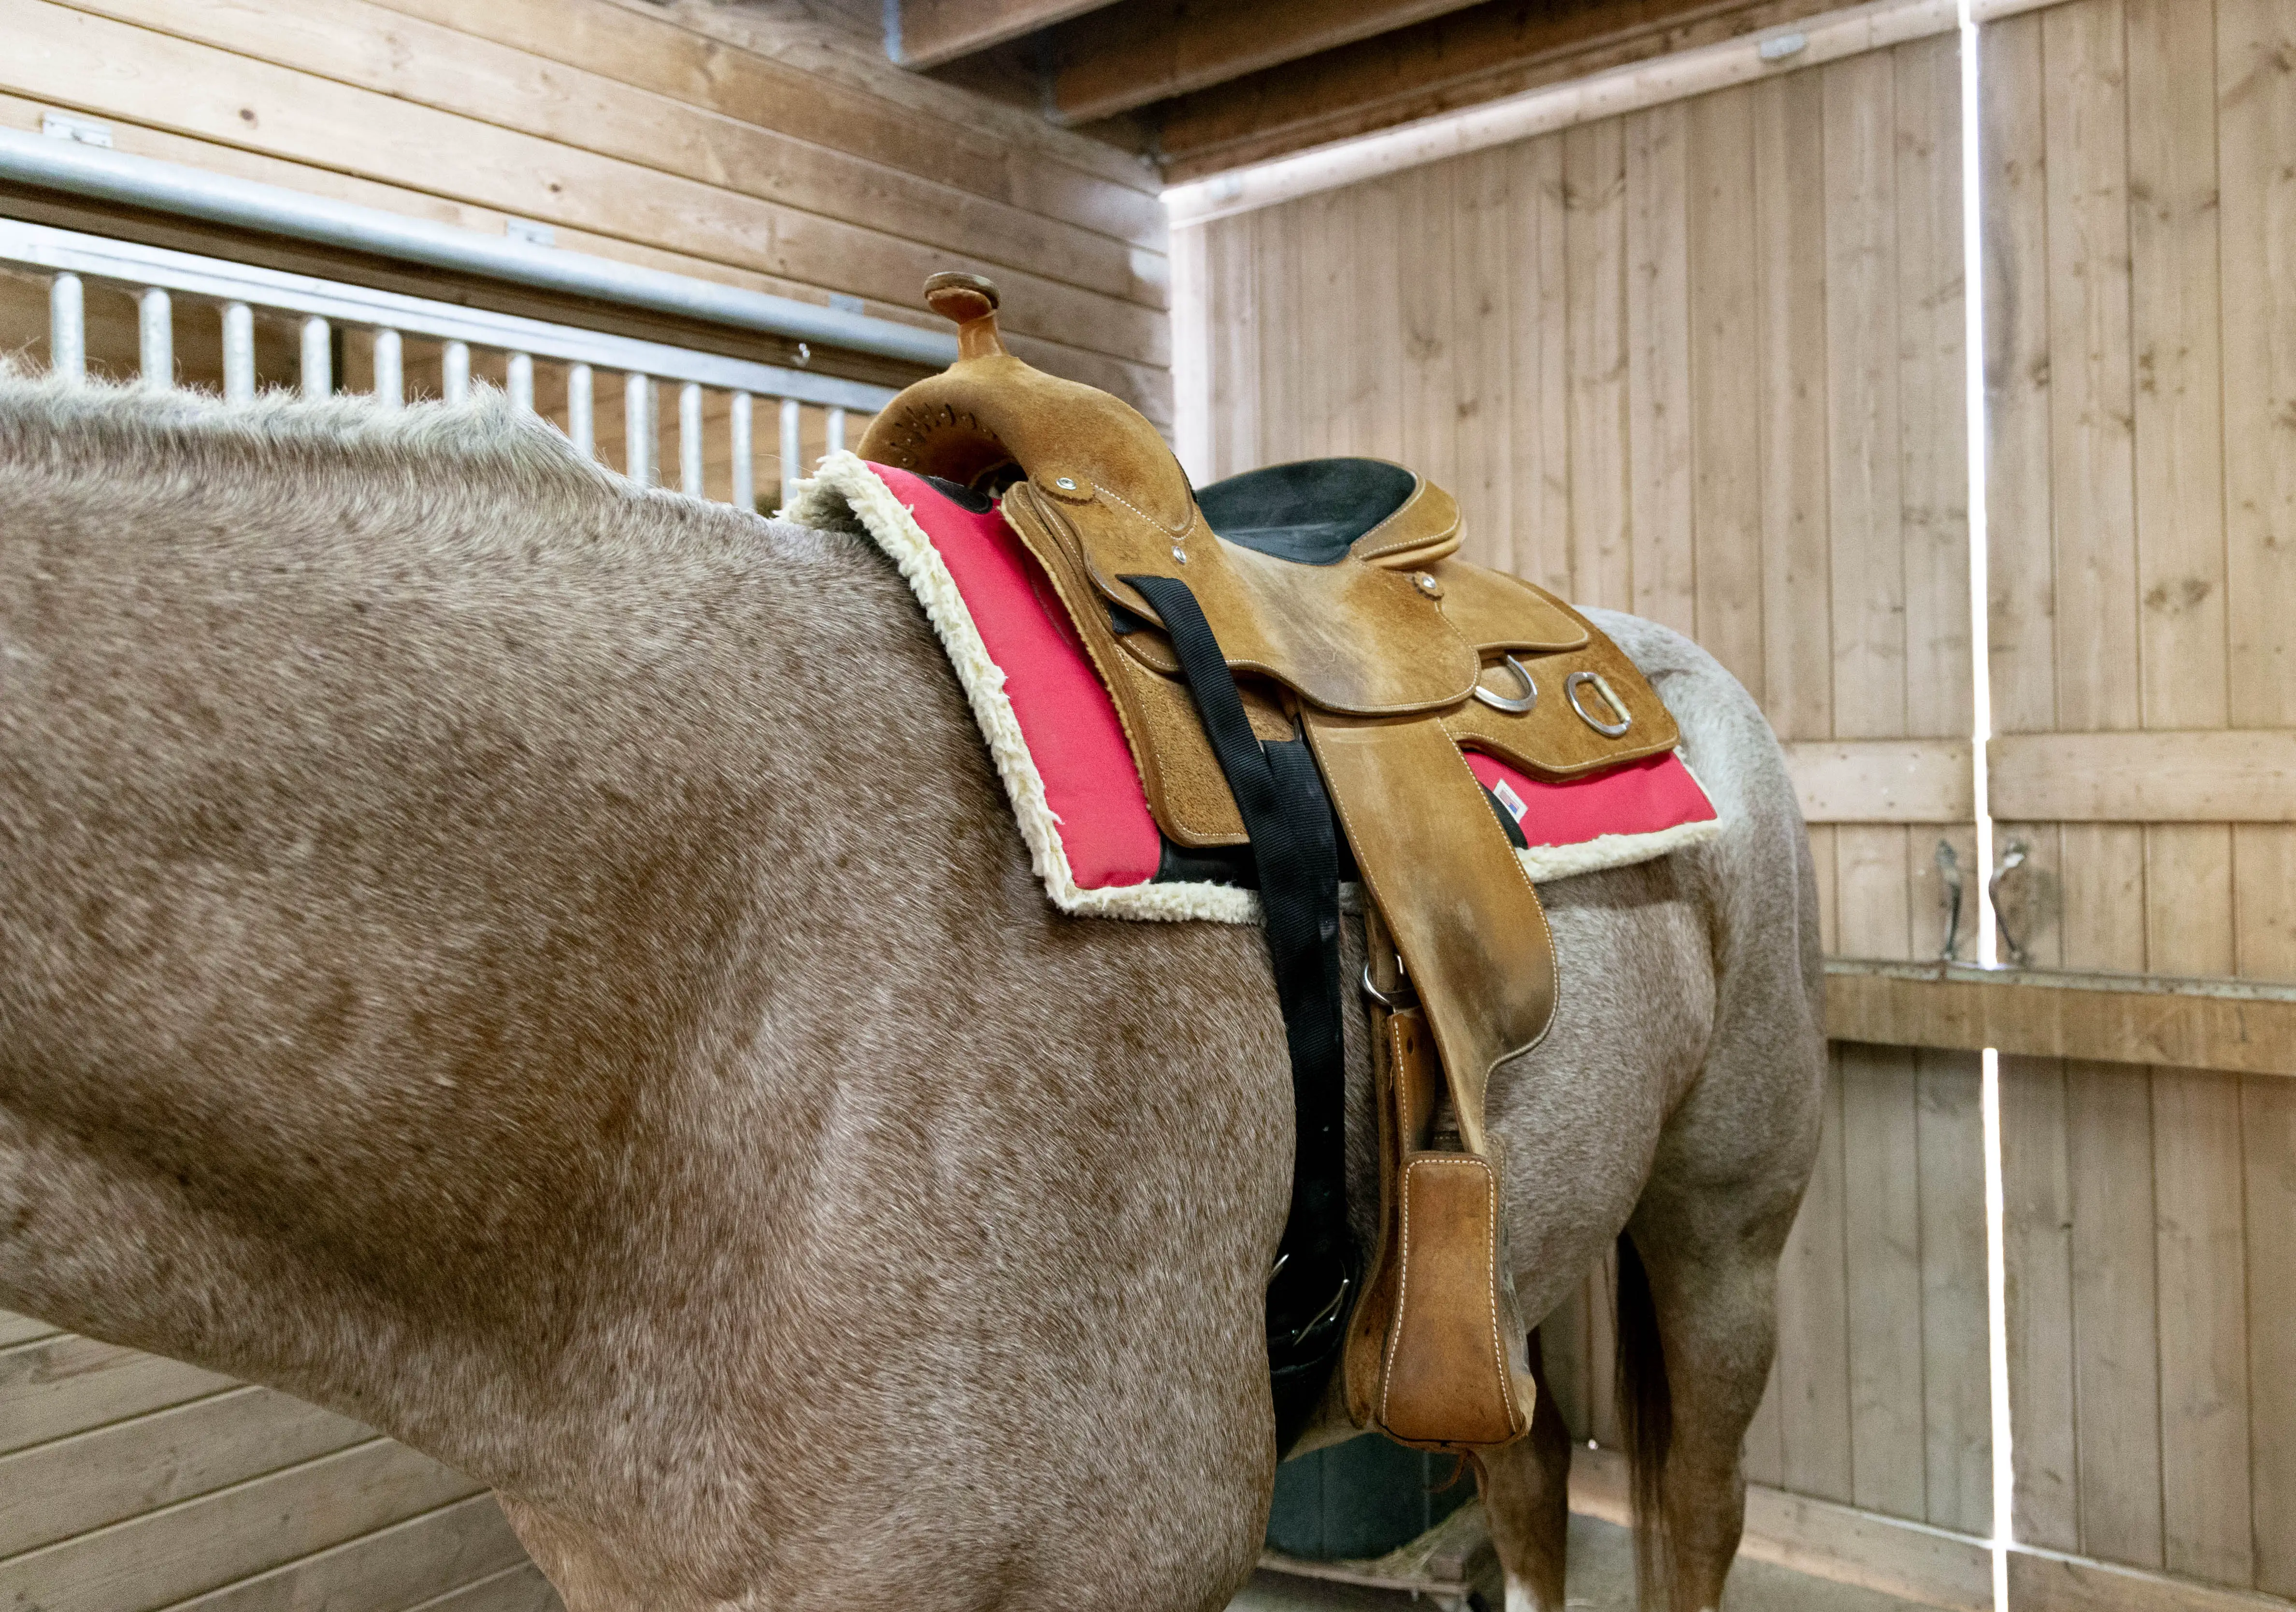
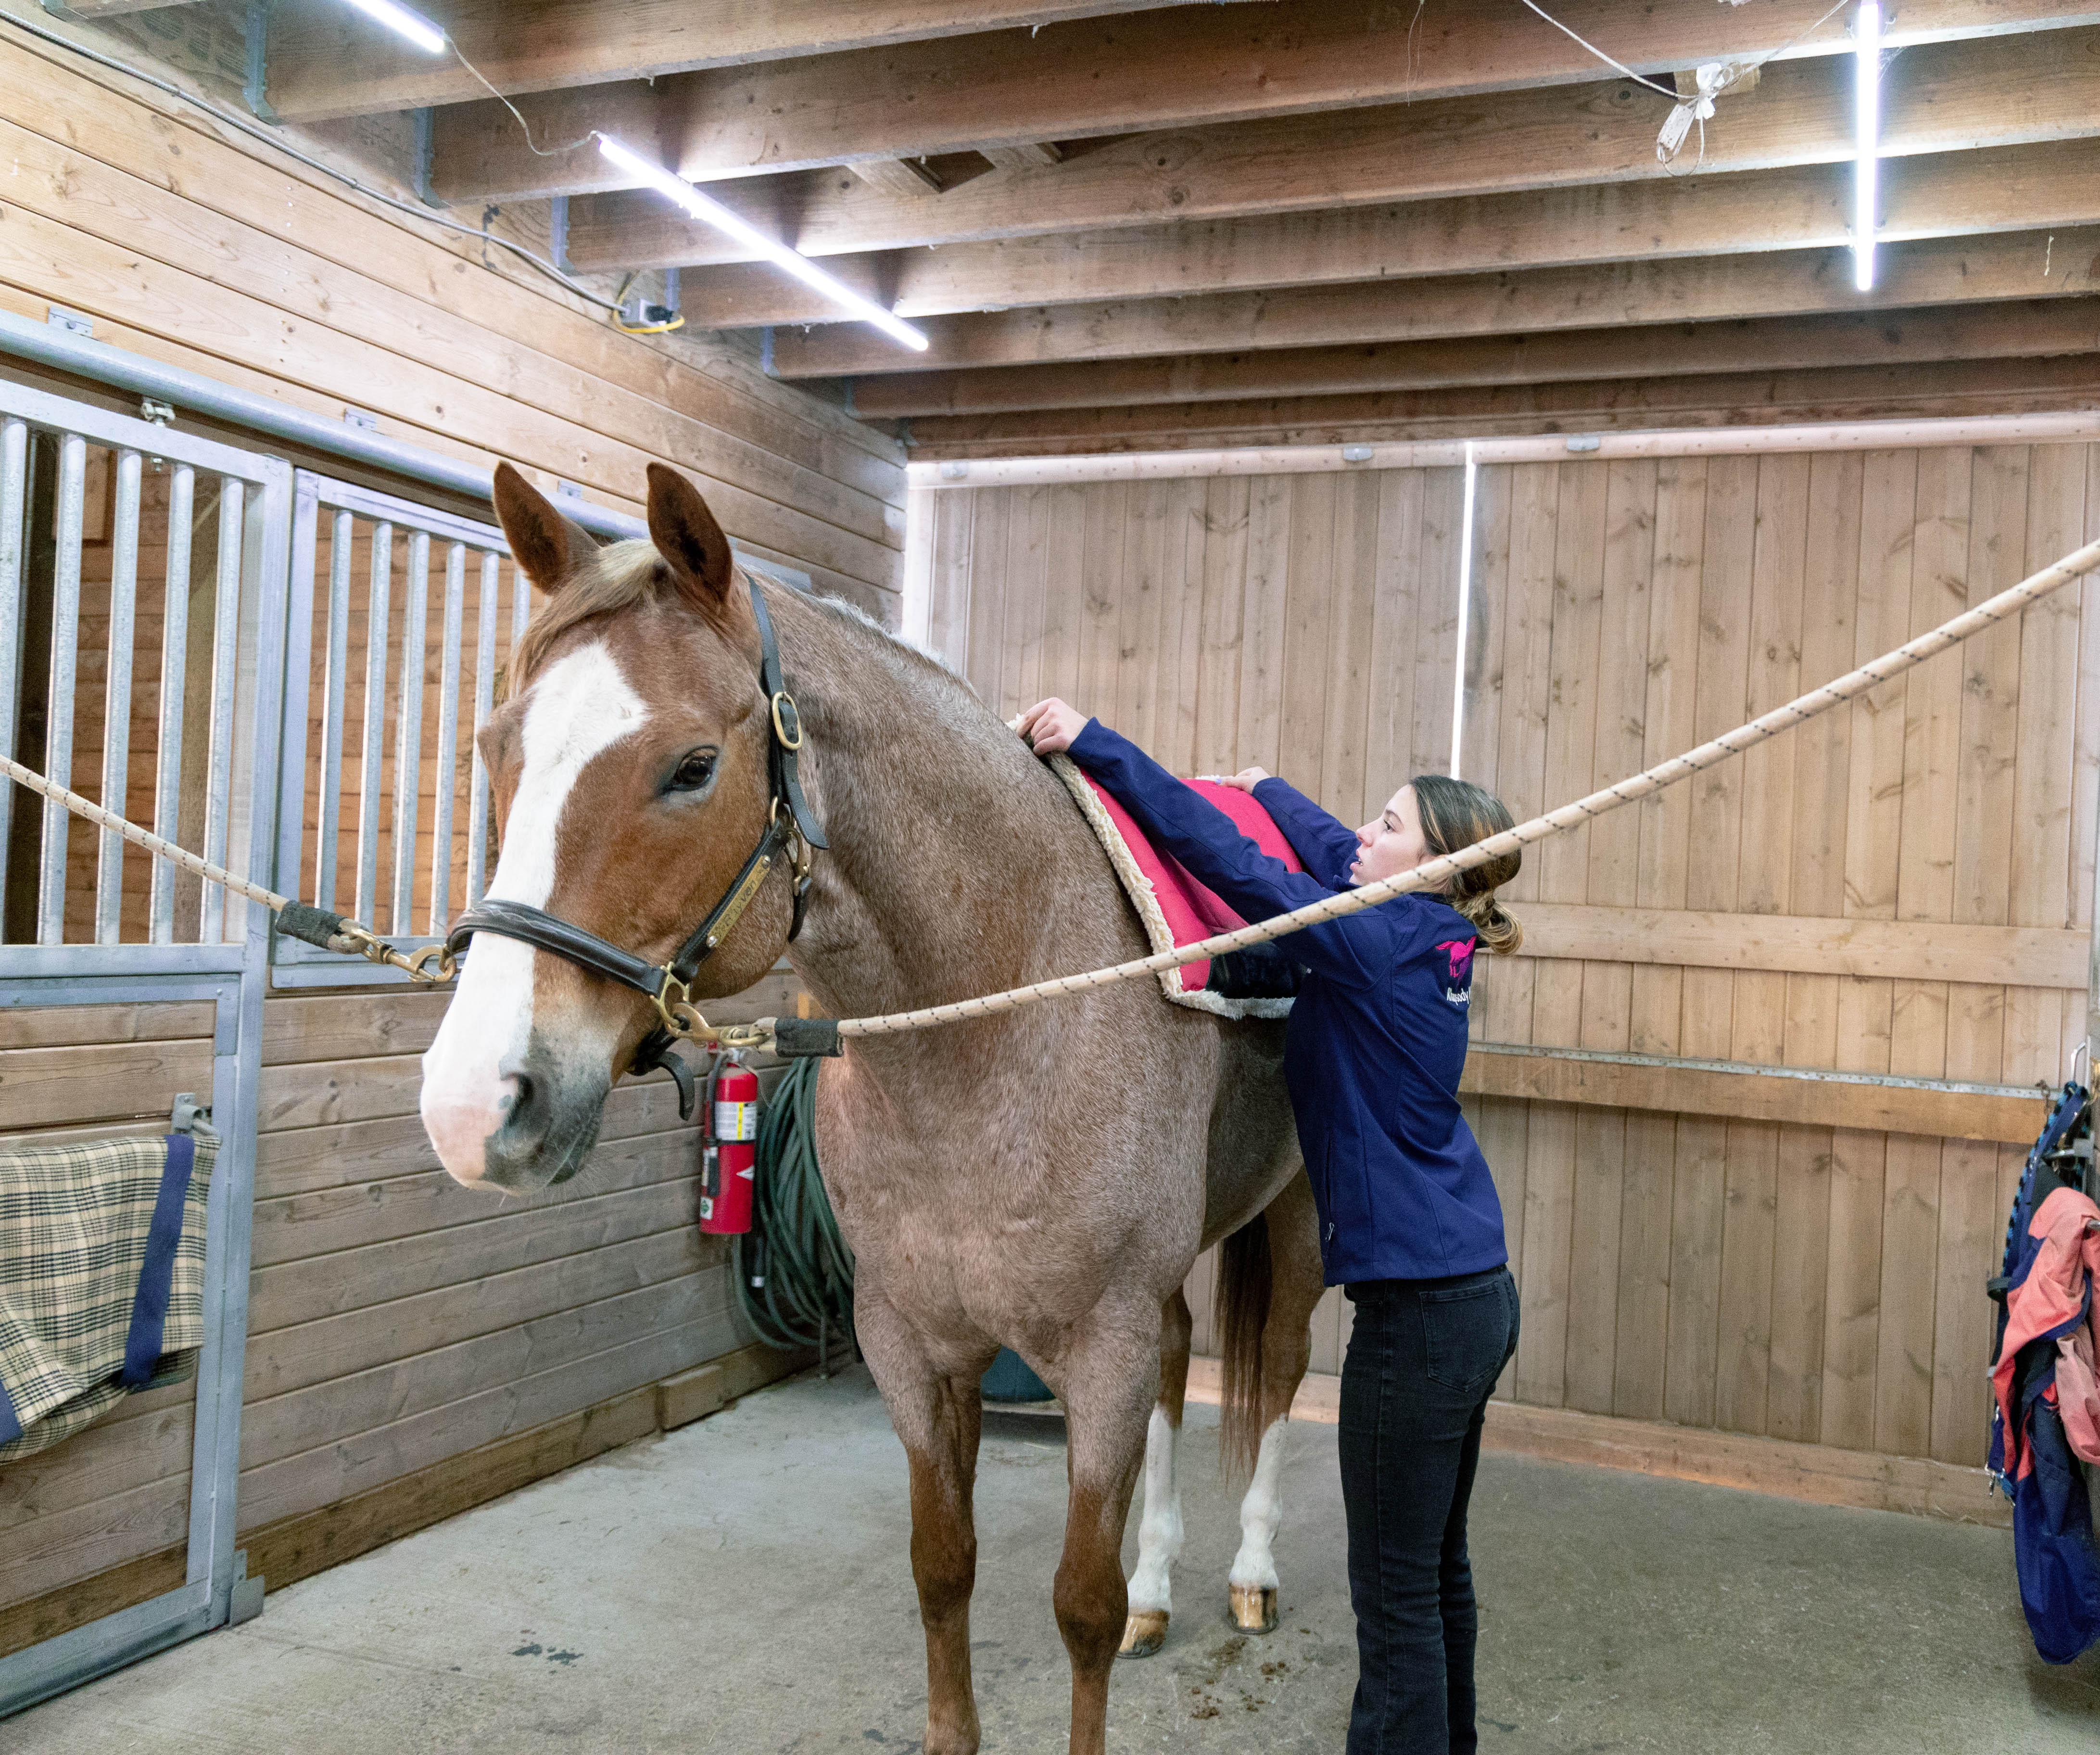
Place Your Saddle Pad On The Horse
Now that your horse is nice and clean, it’s time to start tacking up! First, check to make sure your pad is clean, pick off any debris from the under side of the pad before placing it on your horse. Next, most western pads have a piece of leather or suede on the front end of the pad. This is the side that should be placed above the horse’s withers. Check to make sure your pad is facing the right direction with the front of the pad in your left hand. Stand to your horse’s left side and place the pad on the horse.
If your pad is too far back, make sure to lift it up slightly before moving it forwards to avoid pulling your horse’s hair the wrong direction. If the pad is too far forward, gently slide it back a little.
How To Place The Saddle On The Horse
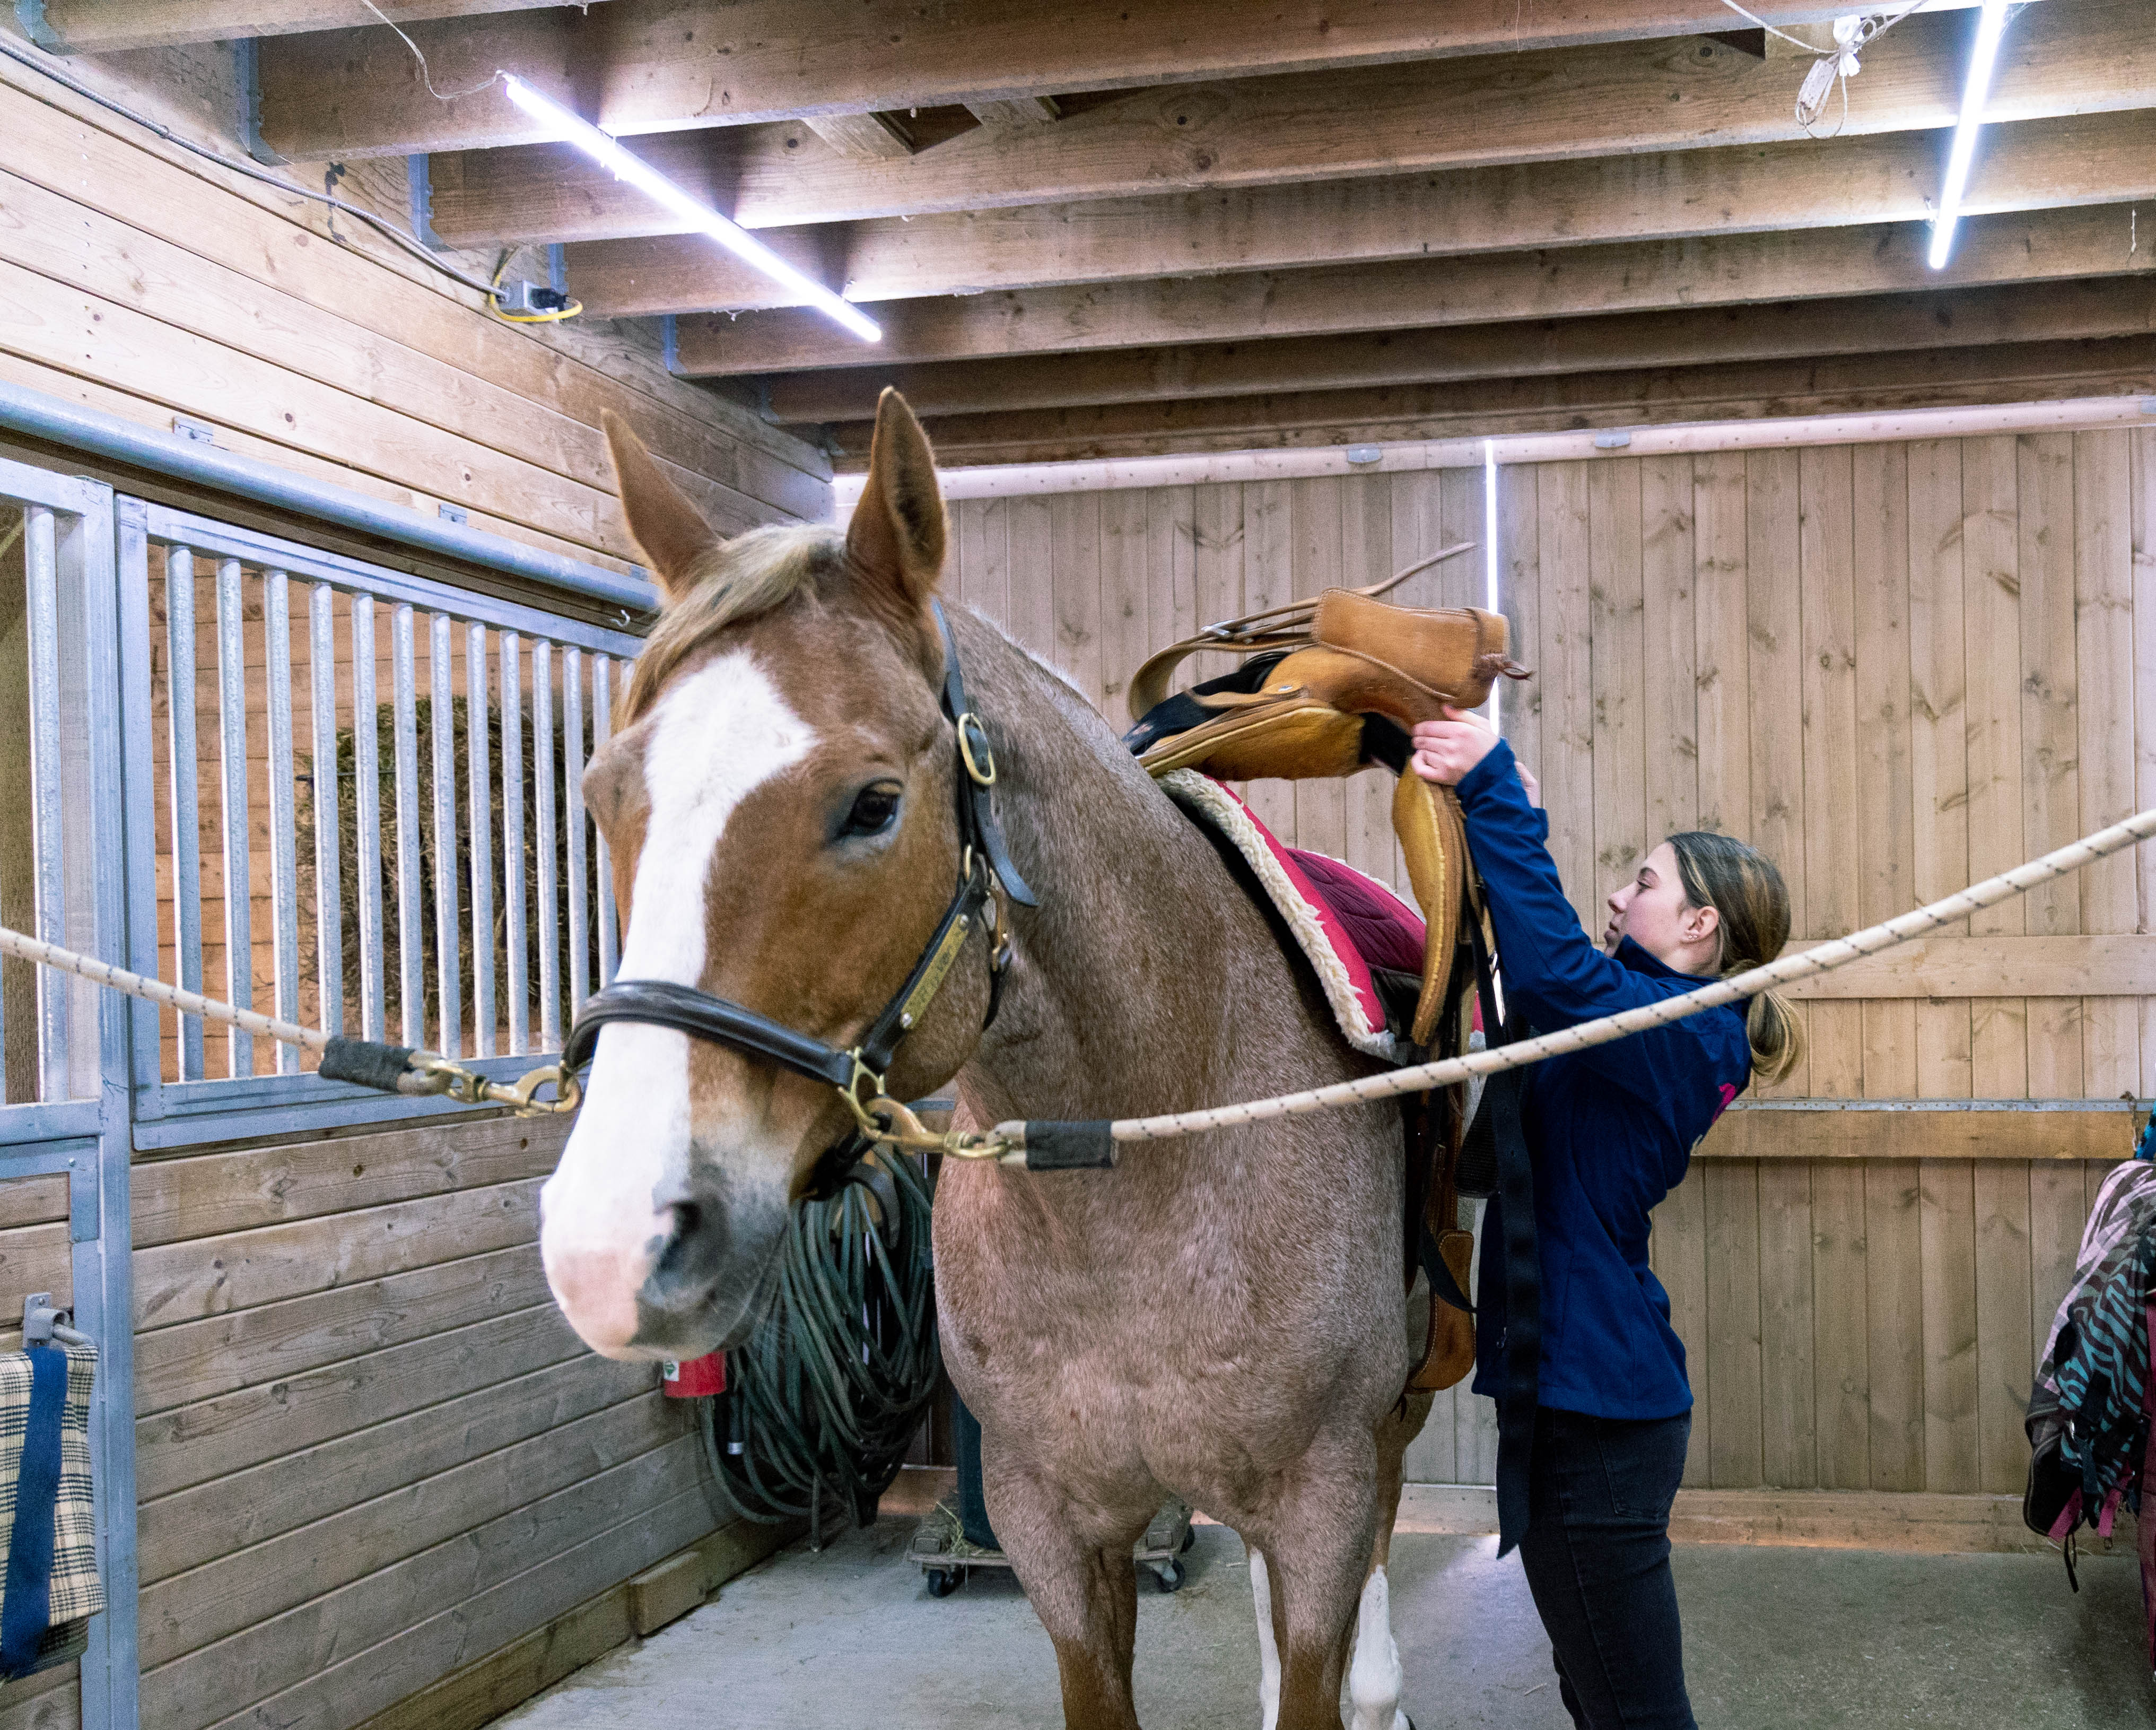
Next is the tricky part, lifting your heavy western saddle onto your horse carefully, without dropping it on their back. When you’re first learning how to tack up your horse western this will be difficult. It takes a bit of practice, but here’s how I like to do it. First, while my saddle is on the saddle rack, I place the right stirrup up onto the horn. This prevents it from getting stuck under the saddle while I’m saddling the horse. Next, I also place my girth over the saddle, usually across the seat. Be careful doing this as you don’t want to scratch your saddle.
Once the stirrup and girth are out of the way, next I lift the saddle with a little bit of a swing from right to left up towards the horse. As I swing the saddle up into the air, I lock my elbows by my sides and keep them bent. This stops the saddle’s motion. Then I slowly bring the saddle down onto the horse’s back so it lands gently. This is pretty difficult so if you’re not strong enough, get someone to help you. The last thing you want to do is slam your horse’s back with a heavy saddle.
Once the saddle is on, walk around to the horse’s right side and take the stirrup down off the horn. Next, take the cinch down and make sure it is hanging straight. Before moving on to tightening your saddle, lift the front of your pad up off your horse’s withers.
Tightening Your Cinch When Learning How To Tack Up Your Horse Western
To secure your saddle, walk back around to the horse’s left side. This time you’ll need to place your left stirrup up onto the horn so it’s out of the way. Carefully reach under the horse to grab hold of the cinch. Stand close to your horse and move slowly to avoid a spook, kick or other accident. Once you have the cinch, use your right hand to thread the girth strap through the ring on the cinch. Next, slide the strap through the D-ring on your saddle up and around the first loop. The strap will now be behind your first loop, pull it through the back side of the ring on the girth. Pull gently and slowly until the girth feels tight. Stop frequently to check how tight it is before buckling.
It is easy to over tighten the girth on a western saddle, so be careful not to just crank the girth up as much as you can. You’ll also want to check the tightness underneath the horse rather than from the side as it may be tighter than you think. It’s important to get the girth tight enough to keep your saddle on and in place. However, it is equally important not to over tighten the girth as this can cause discomfort and injury to your horse. Once your girth is tightened sufficiently, take your stirrup down off the horn and place it down gently to avoid hitting your horse’s side.
If you are a beginner rider or just learning how to tack up your horse western, you should have your trainer or an experienced friend check your tack before you mount. You should do this no matter how skilled you think you are. Many accidents can be prevent by ensure tack is fitted and adjusted correctly.
Optional: Use Leg Protection, Fly Masks and Quarter Sheets
Now that your horse is saddled, it’s time to put on your horse’s protective boots or leg wraps. If it’s cold out now is the time to put on your quarter sheet. If the weather is warm or it’s fly season or you plan to ride on the trail, now is a good time to fly spray your horse. Lastly, place your horse’s fly mask on once you remove their halter and before you bridle your horse. These steps are all optional and if you are new to tacking up, you may need to skip them all together for now.
How To Bridle Your Horse
Before you bridle your horse, double check your girth again. Grab your helmet if you wear one and clean up any mess you’ve left in your horse’s stall or the barn aisle. Your trainer or barn manager will greatly appreciate it if you pick up manure and hoof droppings before you walk out of the barn!
When you first learn how to tack up your horse western, the bridle can be intimidating. If you’re having anxiety about putting the bit in your horse’s mouth or learning to put the bridle on, don’t worry. It does take practice, like anything else but it’s not as complicated as you may think.
With your bridle in hand, stand on your horse’s left side. Unclip the cross ties or other tie. Remove your horse’s halter slowly and carefully by pulling it forwards off of his or her face. Keep your right arm under your horse’s head with your right hand gently guiding their nose straight so they don’t try to walk away.
Next, place the top of the headstall in your right hand (pass it from left to right) and hold it up near your horse’s forehead. With your left hand, hold the bottom of the bit and use your thumb to open your horse’s mouth. Horse’s have a space in their mouths where you can gently press on their gums and there are no teeth, this is called the bars. This also where the bit sits once it’s in your horse’s mouth.
Once your horse has opened his mouth gently slide the bit into his mouth and be careful not to hit his teeth. At the same time, gently lift the headstall up with your right hand. This way the bridle won’t fall off when you let go with your left hand. Now place the headstall in your left hand. Use right hand to gently bend your horse’s right ear forward and slide the headstall over it. If you have a one-ear bridle, the ear piece will sit over your horse’s right ear. Next, repeat this step on the left side.

How To Adjust Your Bridle
Check to make sure your bridle is straight. If your bridle has a brow band you will need to buckle the throat latch next. You’ll want to keep it loose enough that you can fit your whole hand in between your horse’s cheek and the throat latch. You’ll also need to make sure the throat latch is loose enough to move back and forth so that as your horse flexes during your ride, he won’t be constricted.
Once your bridle is straight it’s time to check that your curb chain is laying flat. If you’re riding in a snaffle you may not have a curb chain or you may have a leather or rope curb strap to keep the bit from sliding too far through your horse’s mouth.
Depending on the type of bit you’re using, your Western bridle may sit a bit lower on your horse than an English bridle. For example, if your bit has a high port. You can tighten or loosen the cheek pieces to raise or lower the bit.
Often times, English riders look for two wrinkles at the side of the horse’s mouth to see if the bit is positioned correctly. If you’re riding in a snaffle you can follow this method. If your horse is riding in a bit with a port, you may have one or no wrinkles. You want the bit to sit on the bars of the horse’s mouth without dropping too low. Ask your trainer to help adjust your bridle if you are unsure.
I hope you’ve found this guide on how to tack up your horse western helpful! If you did, please share it!
Looking for more articles about riding western? Check out these!
8 Neck Reining Tips For Beginner Riders
Horseback Riding English Vs. Western: 7 Key Differences
How To Tell Which Lead You’re On: Tips For Canter & Lope
What Skills Will You Learn At Your First Riding Lesson
Recent Posts
As horse owners we want to provide the best possible care for our horses. And, sometimes our idea of what is best for the horse may not be what the horse wants. When it comes to turnout there tend to...
Thinking about buying a horse? In this article we'll discuss the seven reasons you need to do a pre-purchase exam before you seal the deal. If your heart is telling you that you've found the right...