If you’re heading off to your first horse show or have never prepared your horse’s mane for western classes before, this article will guide you step by step through the process. Horse show grooming doesn’t have to be stressful but like all things related to horses, it takes a lot of practice.
Which Disciplines Should You Band Your Horse’s Mane For?
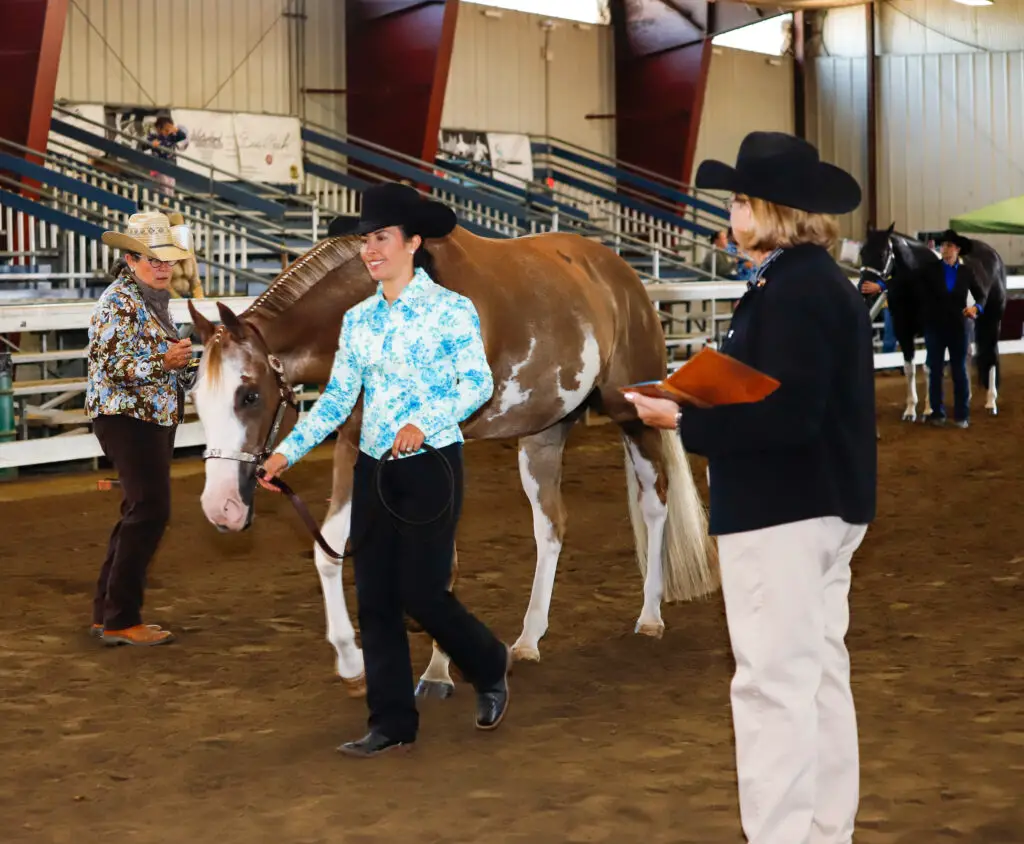
Banded manes are typically seen in western classes such as western pleasure, horsemanship and trail. Often times horses that compete in all-around events over the course of a show will sport banded manes as well. For example, it’s common to see banded manes in classes like hunter under saddle on horses whom compete in both English and Western events.
Preparing The Horse’s Mane For Banding
The most effective way to ensure your bands lay flat against your horse’s neck is to properly prepare his mane. In order to prepare your horse’s mane for banding, you will need to check if the thickness and how even the amount of hair is down the mane. Most horses tend to have thicker manes in the middle of their neck. You may need to do some mane pulling in order to even out your horse’s mane before banding. On a side note, I don’t usually trim my horse’s mane with scissors before banding. The exception would be if the horse’s mane was very long, not too thick and needed to be shortened for showing.
Once I’ve pulled my horse’s mane as necessary, I like to give my horse a bath and wash his mane. I never use conditioner in a short mane as it will make the hair too sleek and slippery. It will be difficult to band and the bands may not stay in place as well. I also avoid spraying any coat polish near my horse’s mane.
Once your horse’s mane is clean and pulled, it’s ready to go!
Banding Supplies You’ll Need
Here’s a list of tools and supplies you’ll need to band your horse’s mane.
- stool
- grooming belt or apron
- elastic bands
- comb
- hair clip
- mane taming spray
- bucket of water
- hard brush
- scissors or thinning shears
Stool: Using a stool to reach your horse’s mane is imperative. You need to work above the mane in order to get your bands to lay flat. Reaching up to work on the horse’s mane will result in a less polished appearance.
Grooming Belt Or Apron: In order to band your horse’s mane efficiently you’ll need a place to keep all of your supplies including comb, clip, bands, scissors and spray without climbing down from your stool repeatedly.
Elastic Bands: Good quality bands will hold the hair and stay tight and in place. Cheap elastic bands with too much stretch or that are too thin are very difficult to work with during the banding process. Poor quality bands can also mean inconsistencies within the finished mane as some bands may be tighter and stay in place better than others. I recommend using Super Bands, they are my go to choice and I use them on my horses.
Comb: You’ll need to comb your horse’s mane to remove any tangles before banding. A comb will also come in handy for sectioning the mane as you band.
Hair Clip: A clip will help keep loose hair out of the band you are working on making the process easier for the bander. It will also hold the hair you are not working with will help keep stray hairs from being pulled into other bands.
Quic Braid: Using a product like Quic braid to make the hair tamer and easier to work with while helping to keep finished bands in place is optional. Many people find this type of product to be very effective. I personally like to use it especially when I’m banding a horse with a thicker mane.
Bucket Of Water & Hard Brush: An alternative to using a product like Quic braid is to dip your hard brush gently into a bucket of water and use it to apply water to the mane. A damp mane is easier to work with and tends to have less fly away hairs.
Scissors or Thinning Shears: Once the mane is fully banded and laying flat, you’ll need to trim the hair to even out the bottom of the mane.
For a complete list of horse show supplies
What Color Bands To Choose
So, what color bands should you choose for your horse? The short answer is, that’s up to you! But, here’s my general rule of thumb. If your banding skills range from beginner to intermediate you should use the same color bands as your horse’s mane color. This gives a neat and tidy appearance and will help to hide any imperfections.
If your banding skills are advanced or you are naturally gifted in the hair department, using a contrasting color on your horse can look really sharp. For example, if you are banding a bay horse with a black mane, you could use white bands.
A word of caution about using a contrasting color for banding. Your bands need to be even and straight. When you stand back away from the horse, the elastics should be in an even row and perfectly straight.
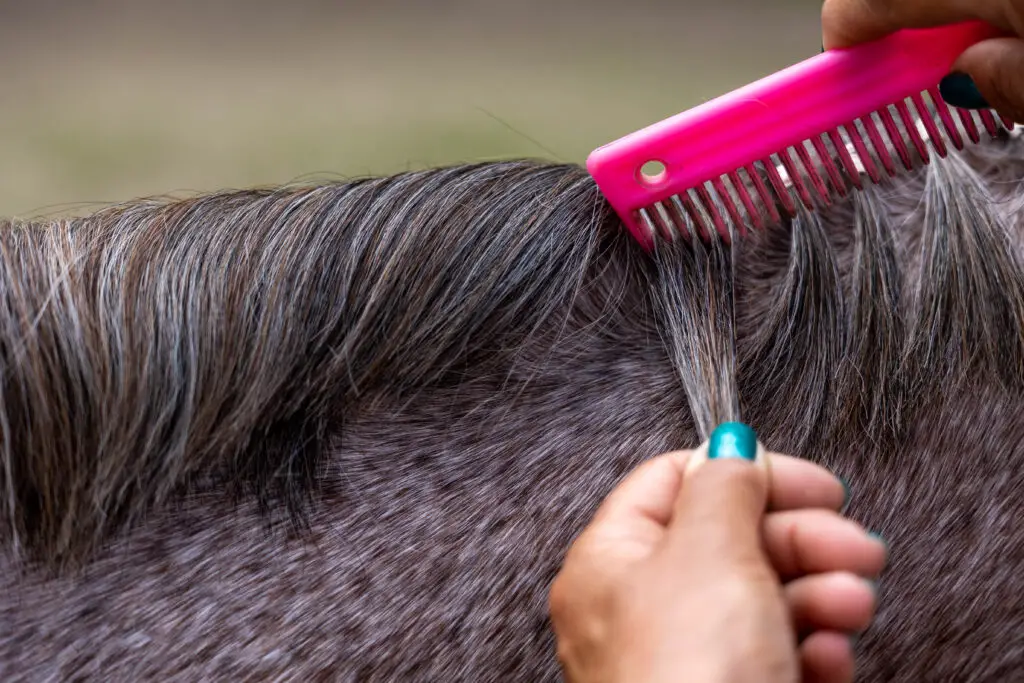
Dampen The Mane
Now that you have all of your supplies ready and your mane prepared it’s time to get started. The first step is to either dampen your horse’s mane using a hard brush dipped in water or you can spray some mane taming spray.
Using a hard brush to dampen the mane by starting at the top of the mane and brushing straight down applies the perfect amount of moisture and lays the hair correctly. If you spray your horse’s mane instead, brush the hair downward after spraying.
Don’t wet the whole mane at once, it will start to dry as you go. Instead, dampen about a 6 inch section and once that section is banded, you can dampen the next section.
Sectioning The Mane
Sectioning the horse’s mane correctly is important. You want all of your bands to be the same thickness and uniform. Take about a half inch section of hair to start, clip the remaining hair out of your way.
In order to keep the bands the same thickness I like to measure using the teeth of my comb. For example, when I use my comb to create one section, I’ll make sure if the first band was the width of three teeth of the comb, I continue to use sections as wide as three teeth for each band.
The thickness of your bands will depend on your horse’s mane. If your horse’s mane is thick you will want to stick with a half inch or slightly less hair in each band. If your horse’s mane is thin, you may need to create sections slightly larger than half an inch wide in order to have enough hair to wrap the band around.
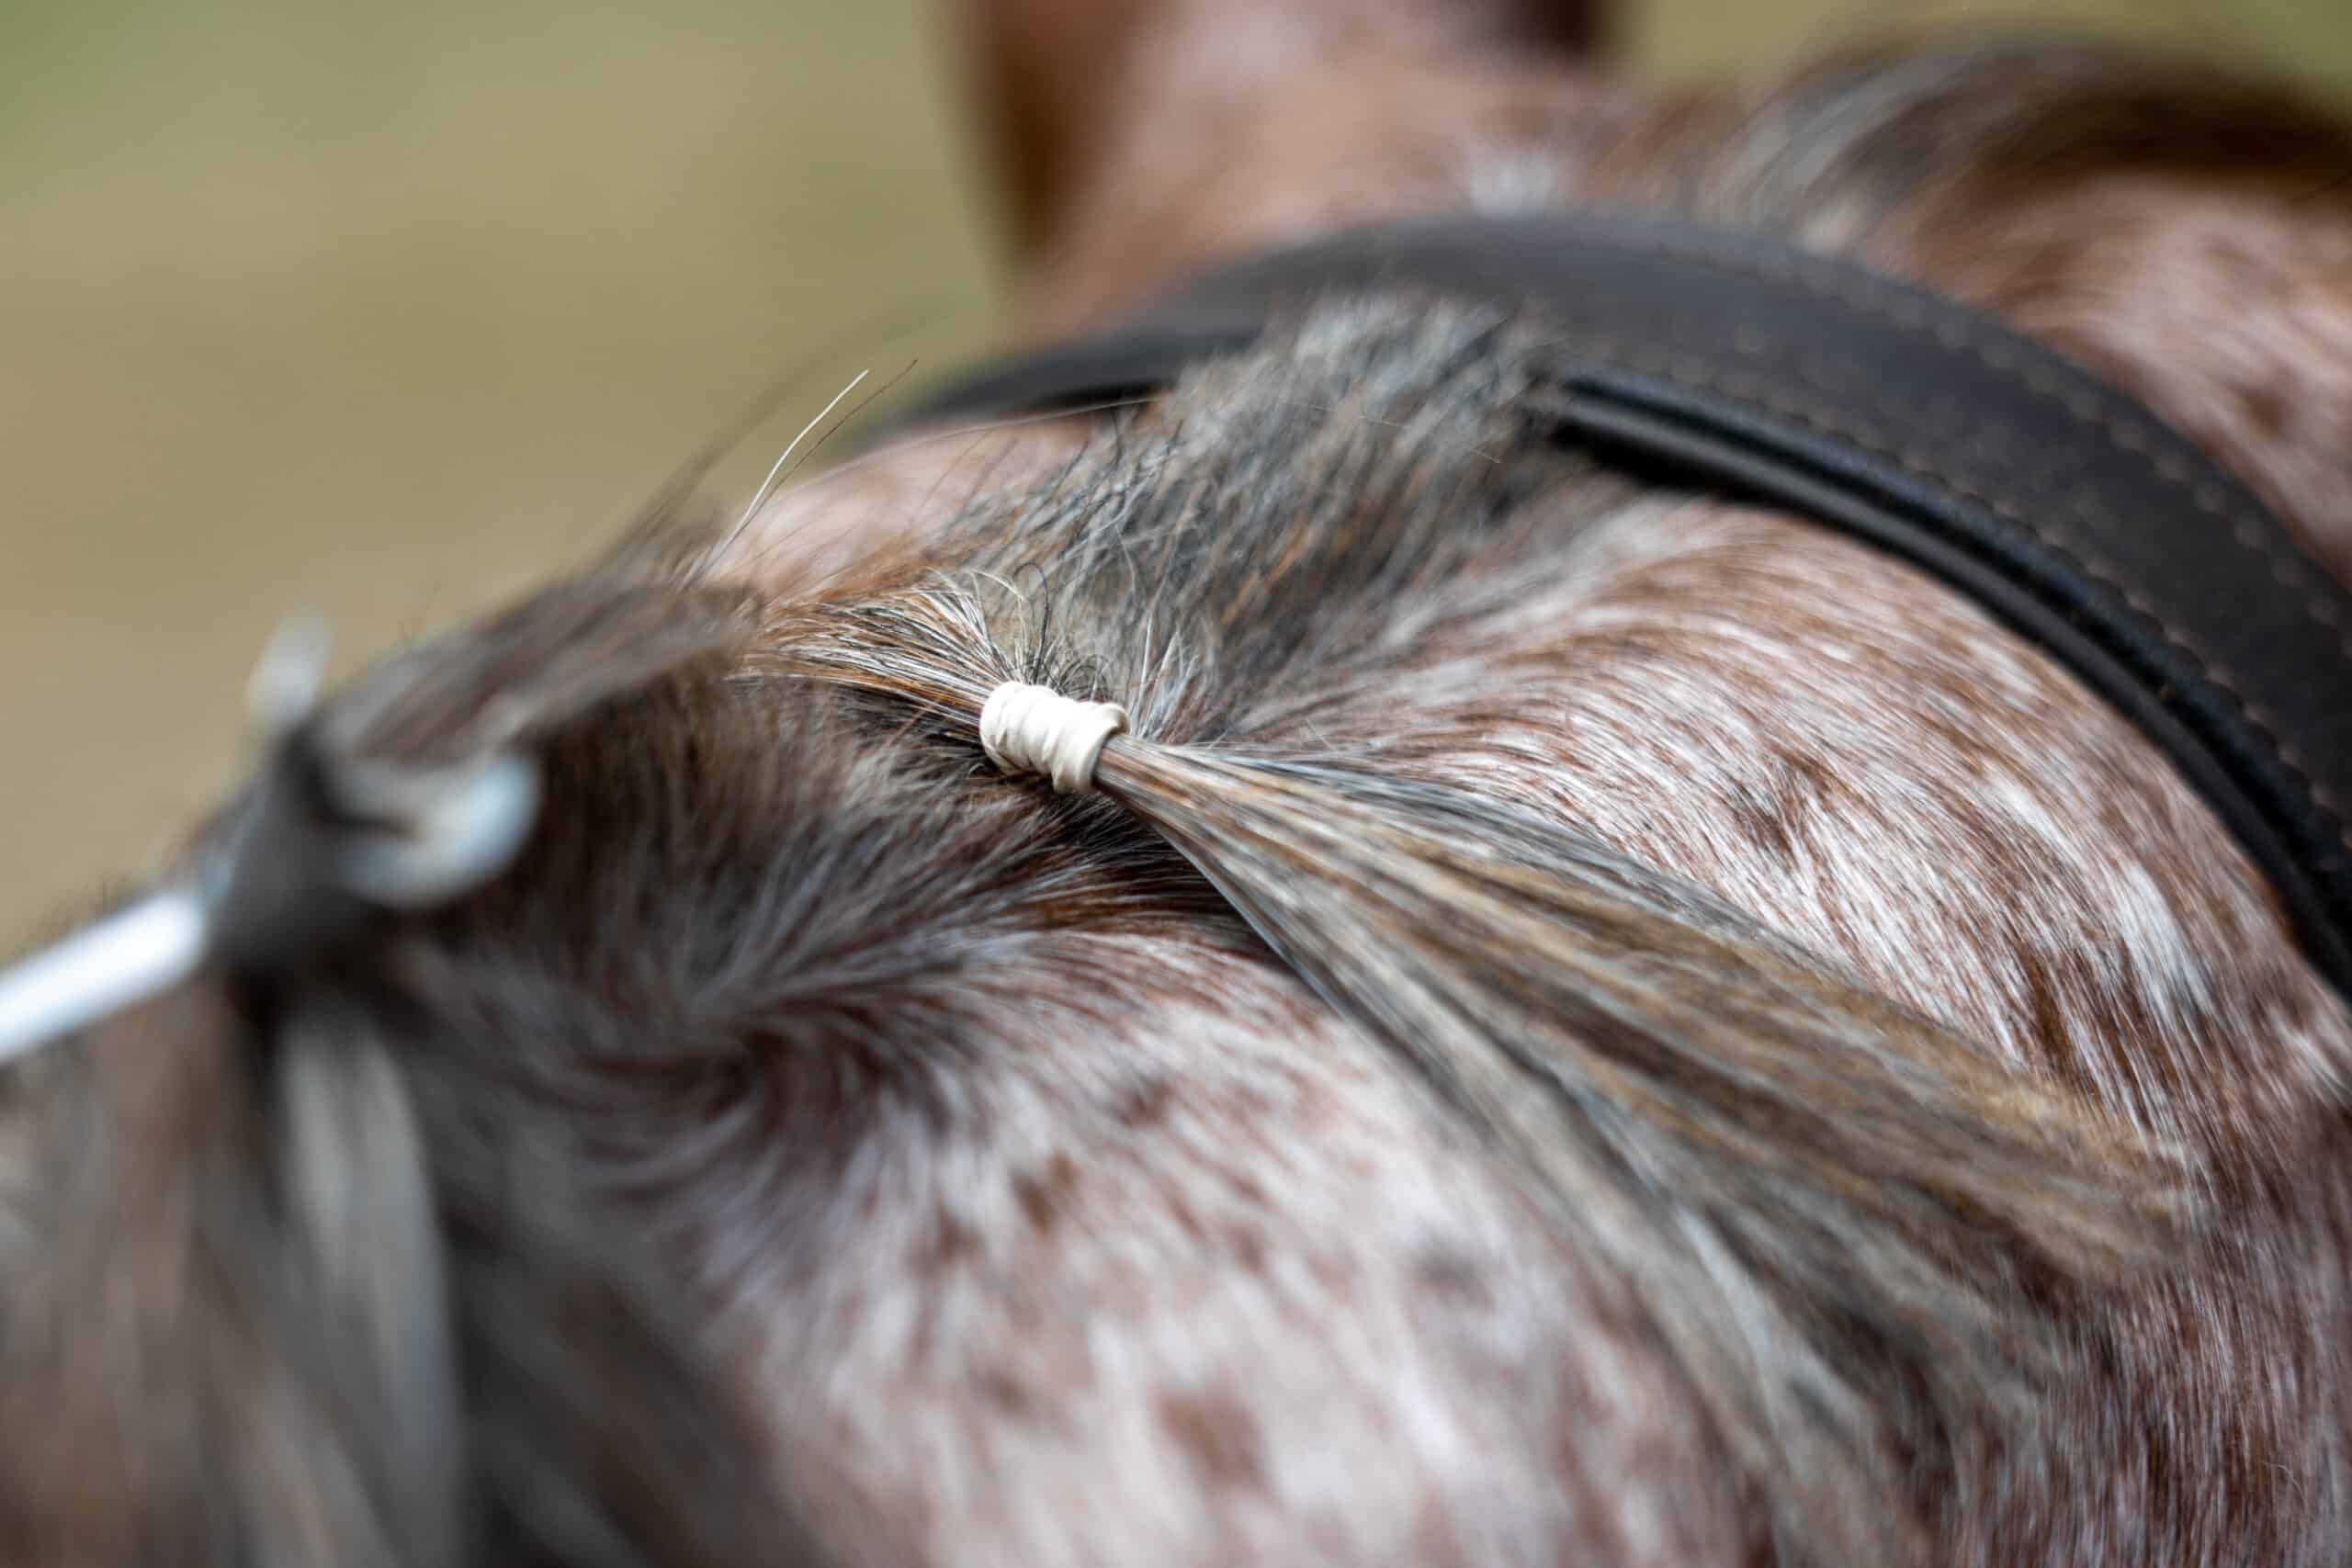
How To Coil The Elastic
There are a couple of different methods for coiling the elastic around your bands. I have found the easiest way to keep my elastics in a straight line is to start my coil at the top of the section and work my way down. Meaning, when I place the elastic on the band, the first coil will be right at the base of the section, close to the horse’s neck.
As you wrap your elastic, pull directly up away from the horse’s neck and towards the sky with the band, and use your other hand to pull the hair straight down. This can be tiring for your fingers but it’s worth the trouble. Pull the elastic up and the hair down towards the neck on every single loop. Banding can be tedious and if your mind starts to wander you may find yourself not pulling the hair taught enough.
Some people start their elastic slightly lower and stack their coils going upwards towards the horse’s crest. However, this is more difficult as there is no marker to ensure you are starting the first coil of the band in the exact same place each time.
Regardless of which way you choose to place your first coil, it’s important that you stack the elastic with each coil sitting directly below (or above) the previous coil creating a cylinder around the horse’s hair.
This method will help to reduce frizz and fly away hairs when you tighten the bands. And, it will also help direct the hair downward towards the neck keeping your bands laying nice and flat.
You will also need to coil the elastic around the section of hair the same amount of times on each band. I typically wrap my elastic at least 5 times. However, this will depend on the horse’s mane, generally speaking, tighter is better. If you warp your elastic 6 times on the first band and you are happy with how the band turns out, make sure you wrap the elastic exactly 6 times on all of your other bands as well.
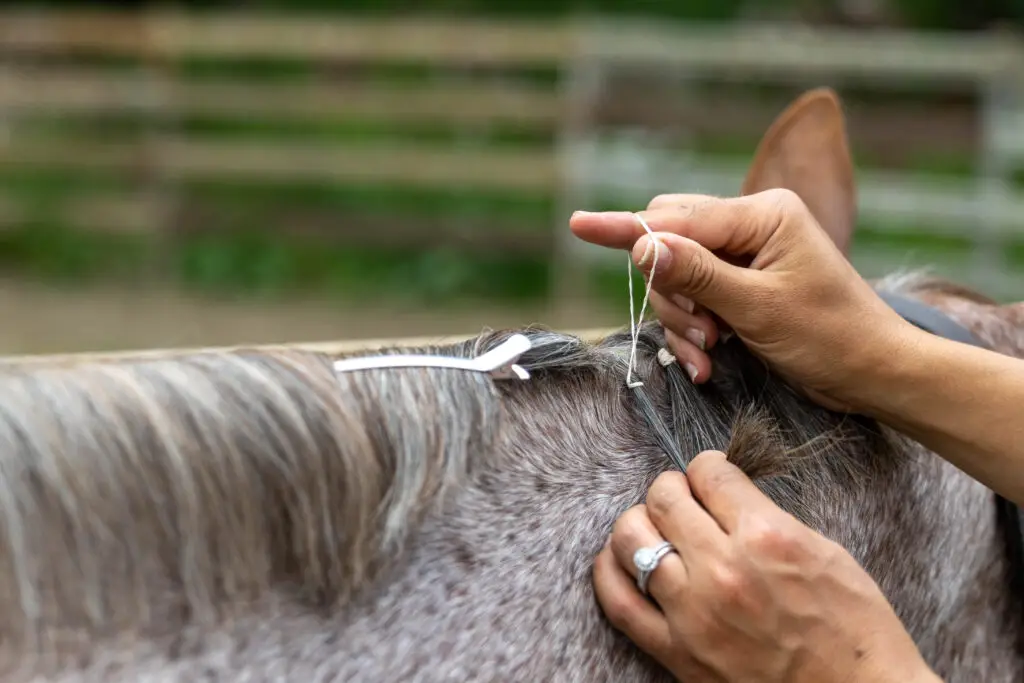
Tightening The Band
Now that your elastic is in a nice cylinder around the section you’re working on, its time to tighten the band. The best way to tighten the band down is to take hair from the back of the section, closest to the horse’s mane. Tightening the back hairs more than the front will keep your band laying down.
Don’t just split the hair and pull like you would a pony tail, or pull hair from the top or your bands will stand up away from the horse’s neck.
Once you have some hair from the back side of the section, split it into two pieces. Use your thumbs and fore fingers to gently pull down and out while slightly rotating your wrists towards the horse.
Final Trim
Now that your horse’s mane is fully banded and tightened down you may notice that the bottom of the mane looks a little uneven. You can trim hair off the bottom to even it out. Make sure your horse will hold still or get someone to hold him. Take your time trimming, horses are bound to move and you don’t want to hack away a chunk of mane after you spent so much time working on it.
Comb the mane, starting below the elastics and use the comb gently as a guide to keep the bottom line even as you go. Hold your scissors parallel to the horse’s neck so you don’t cut your horse.
Some people hold the scissors vertical when trimming the mane to give it a more natural appearance, however I personally struggle with this method.
Once you are done trimming, comb through the mane (below the elastics) one more time. Then, get down off of your stool and stand back to look at the mane. You will most likely find a few stray hairs that need to be trimmed. Touch those up and then you’re done.
Use A Hood To Protect The Mane
The best way to protect your horse’s mane from damage is to use a hood. Your horse is bound to get shavings in his mane or rub the bands out of place when he lays down during the night. If your bands are secured tightly and he wears a hood, your bands should hold and look brand new in the morning.
To read more about how I prepare for horse shows and keep my horses looking sharp, check out my Complete Horse Show Prep Routine.
I recommend using a hood with a zipper instead of one that just pulls on over the horse’s head and neck, this way there is less risk of damaging your horse’s mane. Once you put the hood on your horse, put your hand under the hood and make sure each band is laying straight before zipping up the hood. If any bands get pulled sideways from the hood and stay that way all night, your bands will be crooked in the morning.
I’ve tested and used many hoods over the years, this is my favorite:
When you remove your horse’s hood in the morning, be careful not to tug. Another reason zippers are helpful. Comb the mane again gently and stand back to see if the bands are straight. If any loosened, you can re-tighten them to help straighten them out. Then check to see if you need to trim any stray hairs.
How & When To Band A Forelock
I like to band my horse’s forelock the day of the show instead of the night before. I find that the forelock never stays in place well even with a hood on overnight.
There are multiple methods to banding a forelock. One is to just use one band and tighten it down the same way you would do the mane. Except, don’t trim it!
Alternatively, you can use multiple bands and band the forelock similarly to how you would French braid hair. I like to use three to four bands on a forelock depending on the horse’s hair and how much time I have. For the sake of this article we will use three as an example, but the method is the same if you choose to use more.
Section the top third of the forelock with your comb and make sure it is even and straight. Band this section of hair the same way you did the mane. Use a clip to hold the other forelock hair out of the way.
Once the top third is banded, section the remaining hair into the remaining thirds. Clip the bottom section out of the way. Take the middle third of hair and combine it with the banded top section. Now make sure it’s combed and neat, and band the two sections together. Lastly, combine the remaining loose section of hair with the banded section and add a third elastic.
I hope you found this article helpful! If you did, please share it!
Check out these related articles:
7 Valuable Life Lessons Showing Horses Will Teach You
Pull Your Horse’s Mane Like A Pro: Beginner’s GuideHow To Wash Your Horse’s Tail, A Beginner’s Guide
Complete Horse Show Preparation Routine: Beginner’s GuideFinal Show Ring Preparation: 7 Last Minute Checks
Recent Posts
As horse owners we want to provide the best possible care for our horses. And, sometimes our idea of what is best for the horse may not be what the horse wants. When it comes to turnout there tend to...
Thinking about buying a horse? In this article we'll discuss the seven reasons you need to do a pre-purchase exam before you seal the deal. If your heart is telling you that you've found the right...