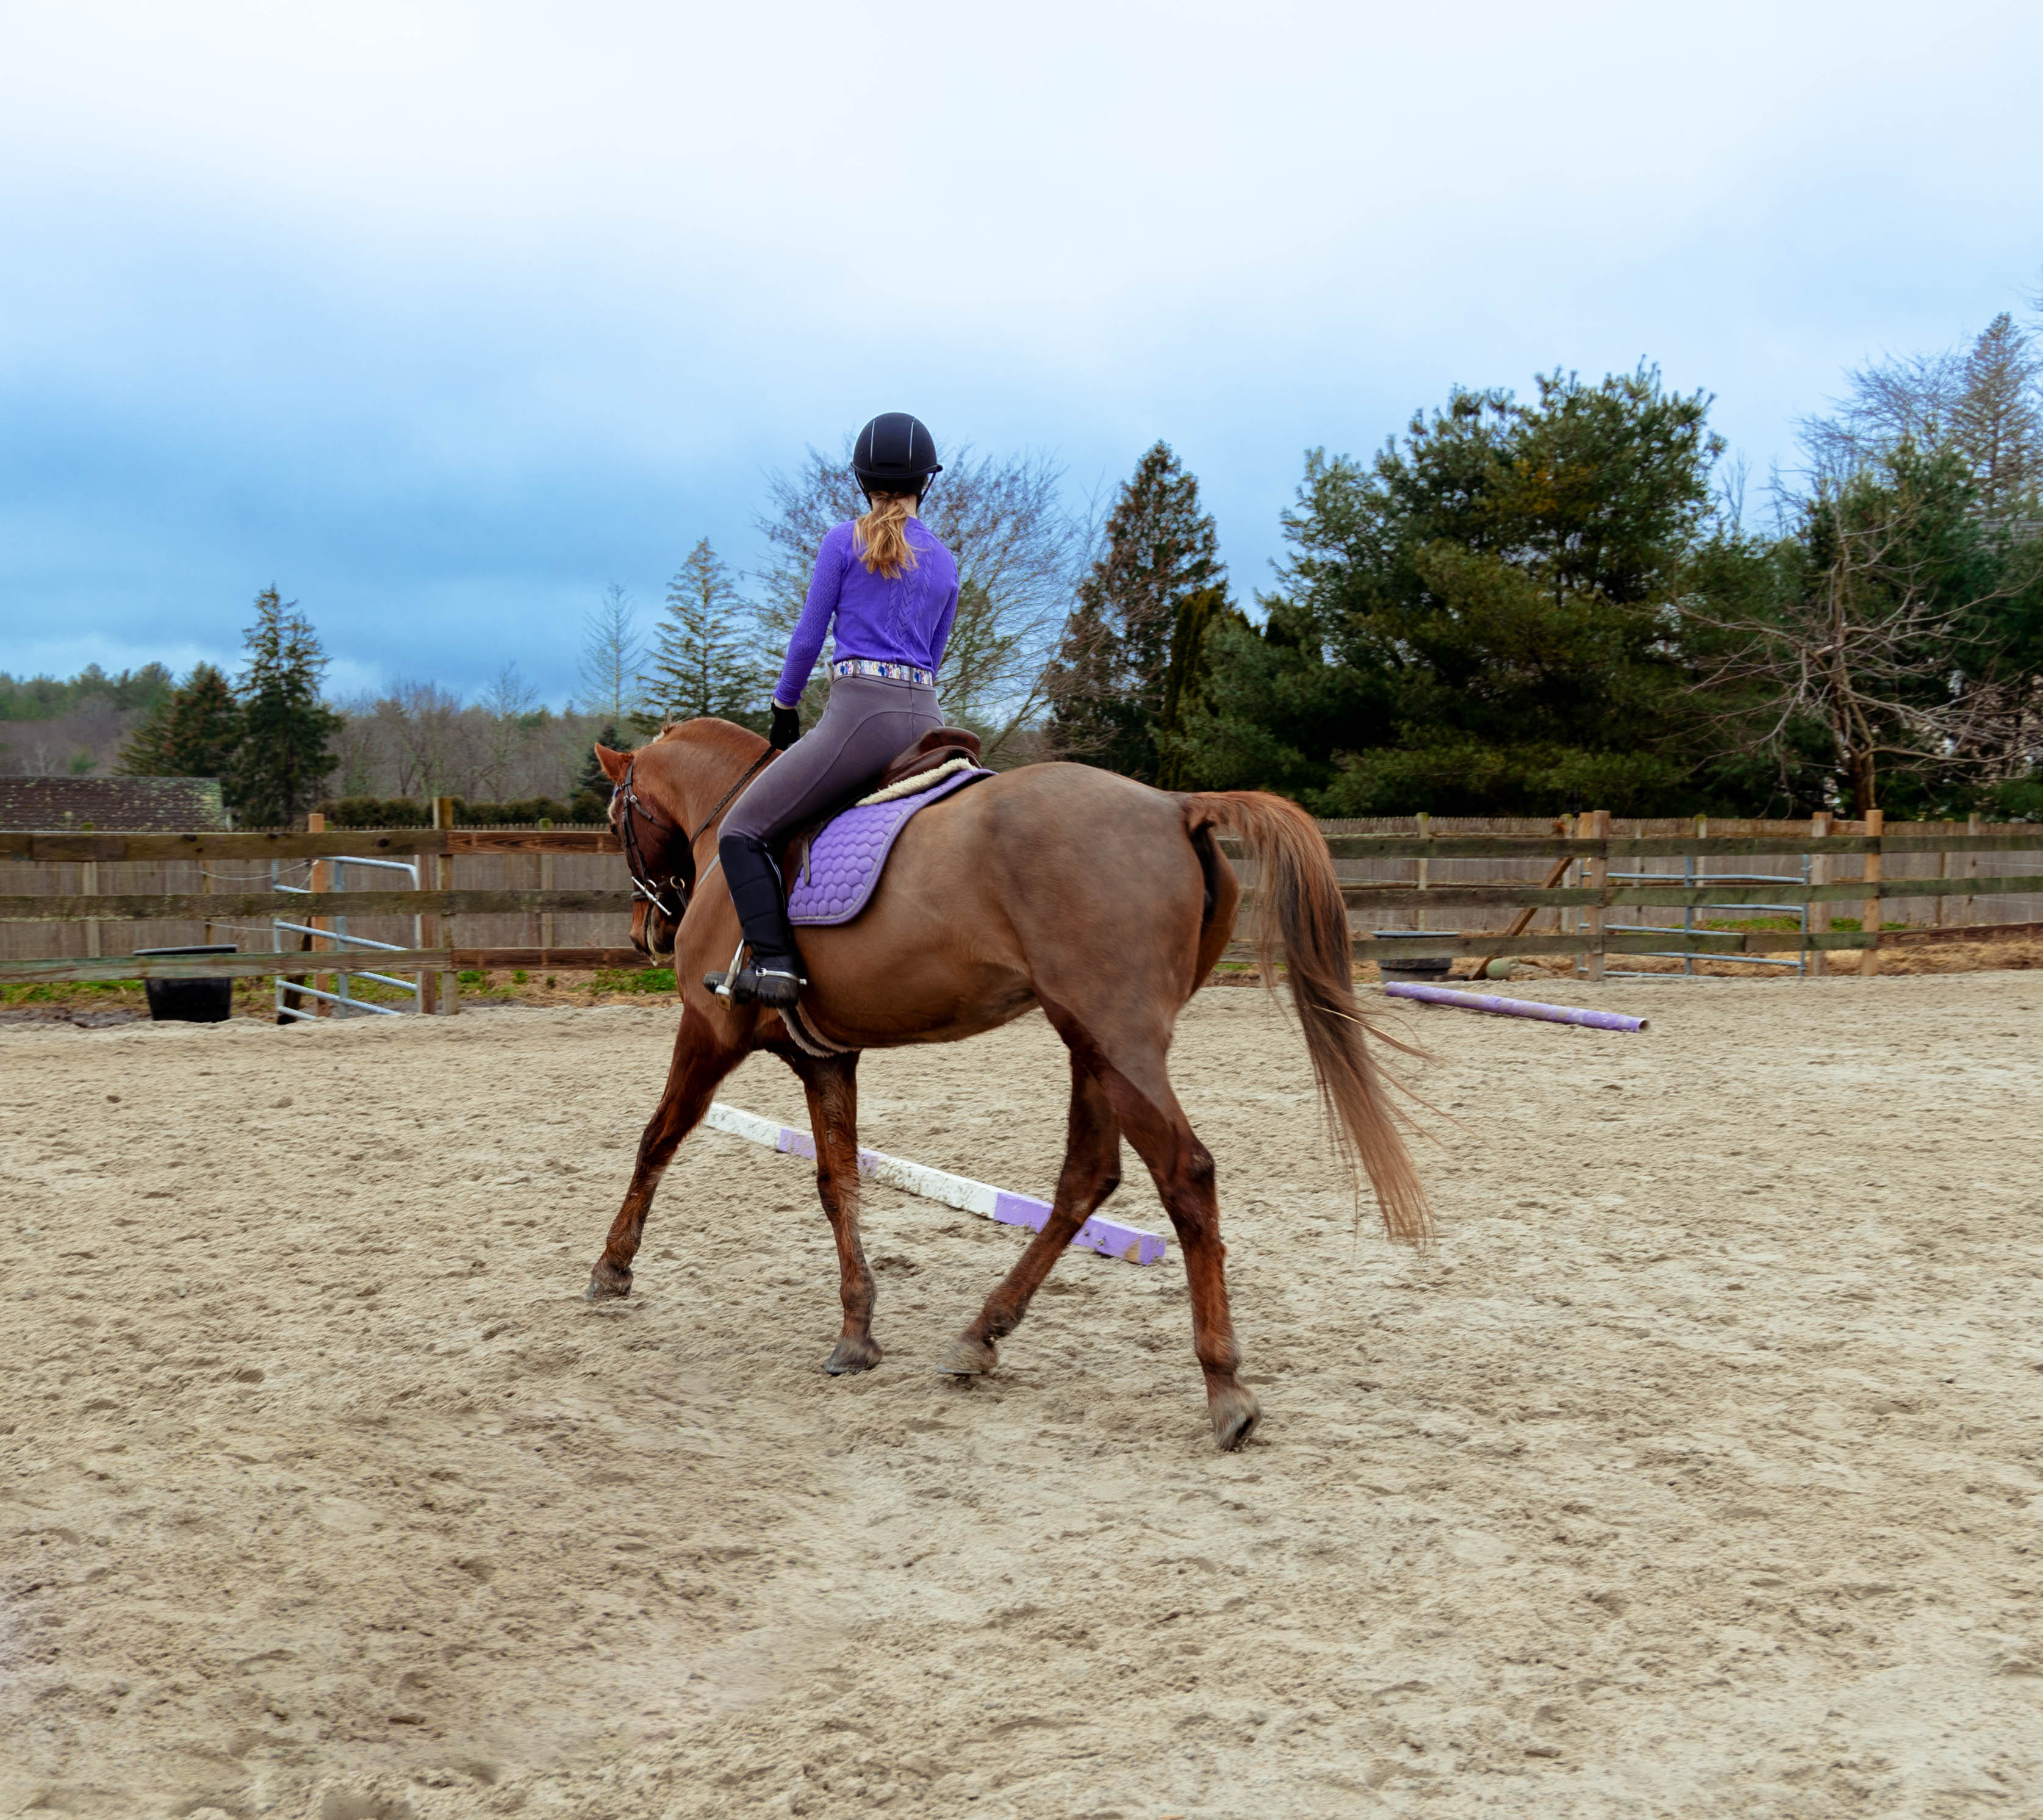
Whether you’re a beginning rider or an instructor teaching novice riders you’ve probably experienced the frustrations of steering. Over and under steering are common and it takes time for a rider to develop enough feel to know how much pressure to use. The exercises in this article will help beginner riders learn how to use their aids, stay coordinated and plan ahead and hopefully have some fun at the same time!
If you’re sick of the same old mundane exercises but still want to practice and progress, try these out!
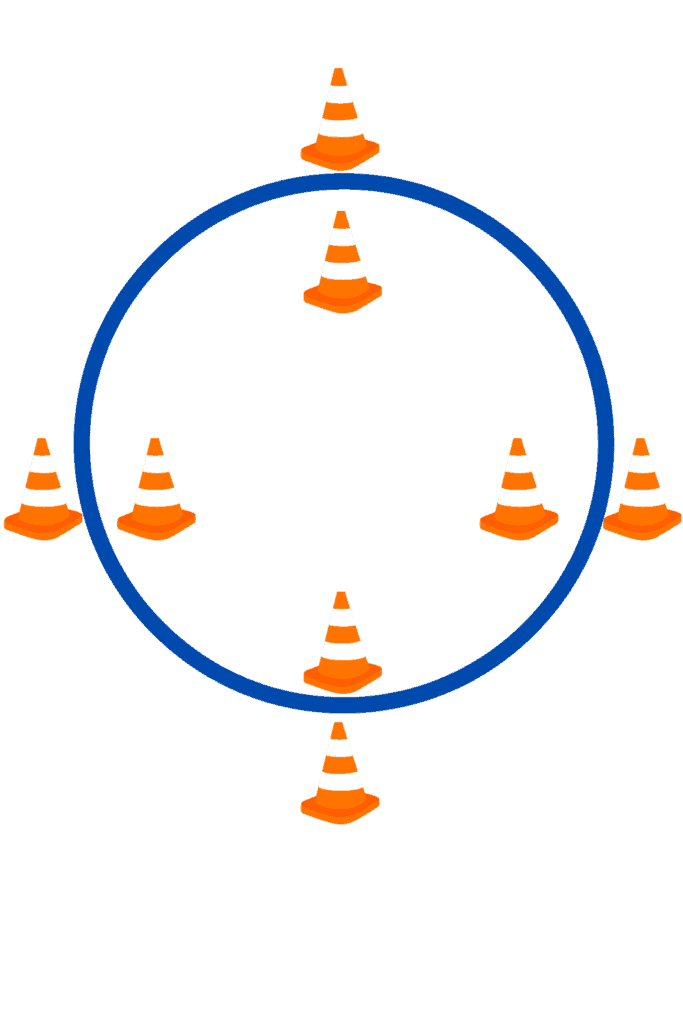
1. Large Circle
One of the most difficult concepts for beginning riders to grasp is how much pressure to apply to the horse. Whether it be steering, moving the horse forward, stopping etc. That said, most new riders tend to over steer and pull the horse hard into a tight turn. Setting up 4 sets of 2 cones and asking them to make a large circle by aiming to walk in between each set of cones can help them learn not to over correct the horse.
Start by setting up a 20 meter or larger circle in your arena and simply walk through the cones around the circle. You can also try this exercise at the trot and canter to work on riding a path and placing the horse’s feet.
2. Circle With Poles
A modified version of riding a large circle is to use ground poles. This not only makes the exercise more challenging but also gives the rider another visual aid for keeping their circle round. Set up four poles on a 20 meter or larger circle. Try to ride over the very center of each pole. If your ground poles have stripes this will be easier.
If not, keep the cones in place and use them in combination with the poles. Try to ride through the cones, over the poles and train your eye to look up at the next pole. This will help riders learn to plan ahead in order to keep the horse in the correct path and make a round circle.
As a side note, you can also try counting the strides in between each pole in order to learn how to steer and maintain rhythm at the same time. However, counting strides should be done after you are confident riding the turns.
3. Small Circle In Each Corner
Learning to make small circles can be a challenge for novice riders as well. Sometimes they start the turn correctly and then end up making a tear drop shape and changing direction or getting pulled into a larger turn.
Place a cone in each corner of the arena about 10 to 12 feet off the rail. Ride a circle around each cone using the corner of the rail as part of the circle. For most people this is easier than trying to make a small circle in the center of the arena. It is easier to keep the circle the same size all the way around and gives the rider a point to focus on.
4. Square
Another exercise to help beginner riders learn to steer is riding a square. Square corners can be difficult even for advanced riders. The point of this exercise is not to learn shoulder control or other advanced techniques that educated riders use.
Start by setting up four cones in a large square in the center of the arena. Try to ride each corner by turning 90 degrees instead of making a loop around the cones. Using two cones on each corner may help riders visualize where the horse should walk.
Riding a square can be done at the walk, trot and canter although it does require coordination, balance and collection to practice at faster gaits. For true beginners this exercise is best done at the walk.
5. Triangle
Similar to riding a square, try setting up the cones in a triangle pattern. The turns will be just as challenging as riding a square but there are only three turns to make instead of four.
This may help take the pressure off for some riders. If you find yourself becoming frustrated while riding the square, try the triangle first!
6. Weave Cones
Another exercise that is helpful in learning how to steer without over steering the horse is to try weaving cones. This is a little more challenging than the exercises listed above as it involves turning the horse both directions in one exercise.
Start by setting up 3 or 4 cones in a straight line and about 12 feet apart. Try to walk through the cones without hitting or missing a cone and then continue walking straight to the end of the arena.
To make this exercise more challenging, turn around the last cone and weave the cones back to the start. You can also add more cones depending on the size of your arena. Once you are comfortable walking and trotting through the cones, place them closer together. As you become more coordinated you won’t need as much time to plan for the next turn.
7. Figure 8
Riding figure 8’s is a very helpful tool for beginner riders to learn how to change aids, steer and plan ahead. There are several ways to ride a figure 8 no matter how large or small your riding arena. For very novice riders, use the whole arena and cut straight across the middle from B to E or E to B. Next, try making a figure 8 by riding across the diagonal. This can be a challenge for young children as they may forget which way to turn.
The third way to ride a figure 8 is by riding the centerline from A to C or C to A. This is a bit more difficult because the turns at the end of the arena will be tighter. The rider also has to ride a straight line for a longer period of time which can be a challenge for riders learning to balance.
Once you’ve mastered each of the above three methods, try riding smaller figure 8’s using two 10 meter circles. Figure 8’s can be ridden at the walk, trot and canter.
To ride a figure 8 at the canter you’ll need to be confident riding transitions in order to do a simple lead change in the middle of the figure 8. For more information on canter leads and lead changes, check out this article: How To Tell Which Lead You’re On, Tips For Canter and Lope
8. Serpentine
If figure 8’s are starting to become a bore and you’re looking for more of a challenge, try making a three loop serpentine. The same concept applies except the rider will need to change directions multiple times. For riders who have never ridden a serpentine before it is helpful to use cones or ground poles to remind them where to turn.
To add some variation, you can try making serpentines with wide, smooth loops or with tight square corners. If you are riding figure 8’s and serpentines at the trot, don’t forget to change your diagonal each time you change directions. To read my tips for learning your diagonals easily, check out this article: How To Pick Up The Correct Diagonal At The Trot
9. Barrel Racing Pattern
A very fun way to work on steering no matter what discipline you ride is to practice the barrel racing pattern! Do you need barrels? Absolutely not! Just set up some cones if you don’t have barrels! One of the perks about the barrel racing pattern is you can ride it starting either direction. Set up your barrels or cones in a triangle.
Starting before the triangle and in the middle ride towards the left side of the right hand barrel. Turn around the barrel and ride across the triangle to make a left hand turn around the left barrel, so stay to the right of it. As you turn around the left barrel head to the third and furthest barrel to make another left hand turn.
10. Walk/Trot Ground Pole Course
Another fun way to practice steering at any gate is a course of ground poles. Even if you don’t ride English or don’t plan to jump, learning a course and a series of turns will help you balance and stay engaged with your horse. You can set up 4 to 6 poles to start and place them in different areas of the arena.
For example, you could place a line of two poles just inside one long side of the arena and space them a few strides apart. Another pole could go across the diagonal and another on the opposite long side of the arena.
You can really place your poles anywhere as long as you measure the distance if you plan to trot and canter so you’ll know how many strides apart the poles are. Once you’ve ridden the course, try using the same poles to create a different course and ride it again.
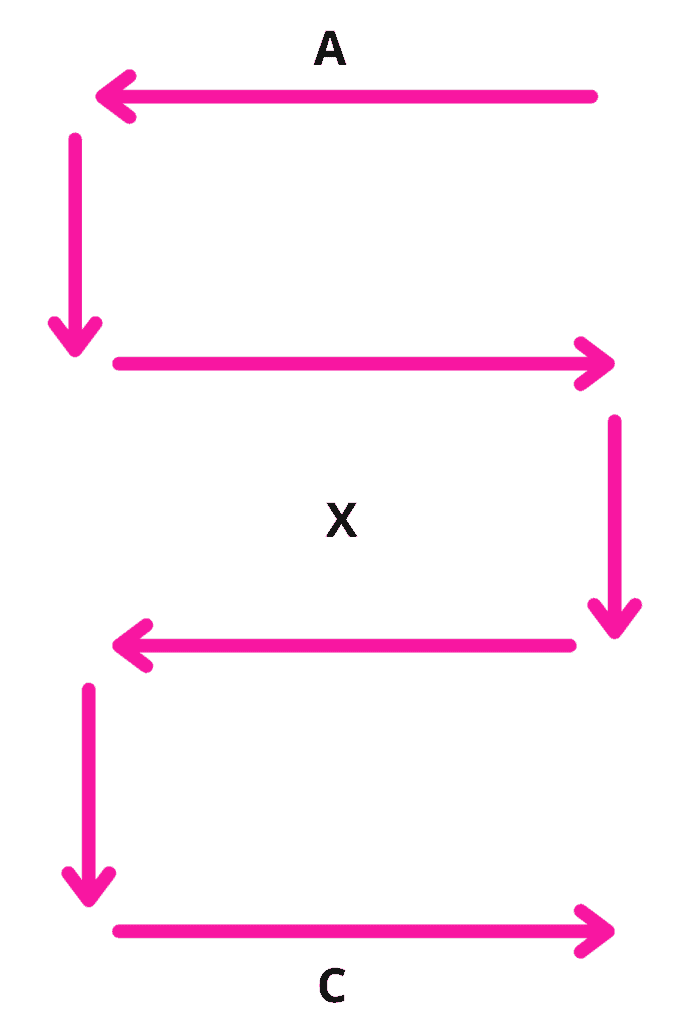
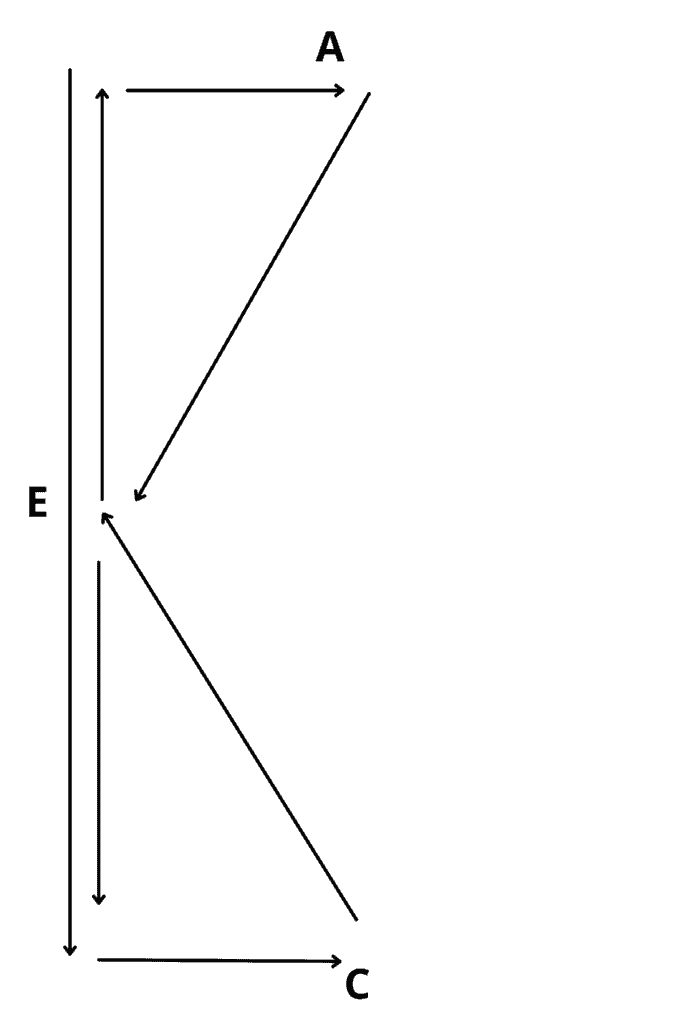
11. Bow Tie
This is an interesting one and not your run of the mill figure 8. Starting at letter A, ride down the arena until you reach letter C. At C, turn and ride to letter E. At E stay on the rail until you’ve ridden back to A, then turn and ride back to E.
When you’ve gone completely through the exercise the shape you’ve ridden will look like a bow tie. Don’t forget to change diagonals if you ride this exercise at the trot! To help you stay on track, just remember to keep turning back to E in a diagonal line.
12. Draw A Picture
I can’t take credit for this idea. But, it has stuck in my memory since I was 5 years old!
When I began riding at age 5, I took lessons on a lovely Dartmoor pony named Peanuts. He was bay and fuzzy and I loved him. I learned how to walk, trot, canter and jump on him and I even got to ride him on some trail rides!
My instructor used to ask me to draw a picture for her using Peanuts as the pencil. Then she would try to guess what I drew.
Over the years my mom has used this exercise at our farm to teach beginners how to steer and to keep things interesting. So give this one a try if you need a fun way to practice steering.
If you’re an instructor, you can also ask your students to draw certain shapes like a question mark, smiley face, house etc.
13. Pick A Letter
The great thing about this exercise, is the student gets to determine where they ride. And, it’s pretty simple. You don’t need any equipment other than arena letters or if you don’t have letters, you can use landmarks around the arena.
To start, stand in the center of the arena. Choose a letter to ride to and guide the horse all the way there. Once you’ve reached the letter, say letter B, the student can decide the next letter. Maybe they choose F.
The exercise continues on until they have ridden to each letter of the arena without riding on the rail. So, the rider might zig zag around the ring for a few minutes but they’ll have to figure out where they are going and how to get there.
I hope you’ve found this post helpful! If you did, please give it a share!
For more beginner friendly riding exercises check out these articles!
12 Mounted Horseback Riding Stretches To Do When You Ride
16 Super Fun Horse Camp Activities Your Campers Will Love!
22 Games To Play At Horse Camp This Summer
Recent Posts
As horse owners we want to provide the best possible care for our horses. And, sometimes our idea of what is best for the horse may not be what the horse wants. When it comes to turnout there tend to...
Thinking about buying a horse? In this article we'll discuss the seven reasons you need to do a pre-purchase exam before you seal the deal. If your heart is telling you that you've found the right...